
Scars and Wounds
Upon becoming a member of the living undead, one of the facts that you will have to accept is that you will have your fair share of scars and wounds! From the zombie bite that infected you, and the scars you suffered from crawling out of a grave, to the shotgun blasts that pesky humans inflict upon you as they flee in terror, all zombies boast their fair share of bumps and bruises.
Therefore, if you are attending a Halloween party this season, if you intend to dress up as a member of the living undead for a cosplay event or simply if you are looking to improve your zombie makeup skills, being able to quickly and easily create your very own zombie wounds is a great skill to have at your disposal.
Choose your zombie Wounds
This tutorial is particularly aimed at those who want to create realistic looking wounds that are associated with zombies. Remember, the longer you are a zombie, the wounds you are likely to have. Once you have created the basic zombie look, add as many wounds as you like to different parts of your body for a truly decaying zombie look.
Prosthetics
We can recommend some great prosthetics including a Walker chest plate that can be added for a professional look. The Zipper face look comes in an easy to apply kit which creates a stunning freaky face that is sure to shock everyone you meet. Check out our range of Halloween Makeup suggestions for some great zombie and Halloween makeup tools that will appeal to both the novice and professional.
Create Gaping Zombie Wounds
Torn flesh and gaping wounds can easily be created with the right materials, some straightfoward guidelines and a little practice. If you are looking for a Zombie Wound Makeup Tutorial that will take you from your normal, stunning everyday look to a full scary zombie makeup, then we have an Easy Zombie Makeup Tutorial that is packed with tips to help you create a great zombie look.
Easy Zombie Wound Tutorial
As such, we have created the following zombie wound makeup tutorial which will tell you everything you need to know about how to create your very own zombie wounds. By following our easy zombie makeup tips that are listed below you will soon be able to rock a gory, gruesome zombie wound that will be the envy of your living undead friends!
Whether you choose to create one wound or two, with a little latex, a lot of stage blood and the help of our zombie makeup tutorial you will be able to create your very own zombie wound in no time at all!
Recommended zombie makeup supplies
Here is our list of suggested makeup tools for creating professional looking wounds such as those in our 9 Step Zombie Wound Guide as well as our recommended wound makeup video tutorials.
Add a box of tissues and a jar of petroleum jelly and you will have everything you need to start creating.
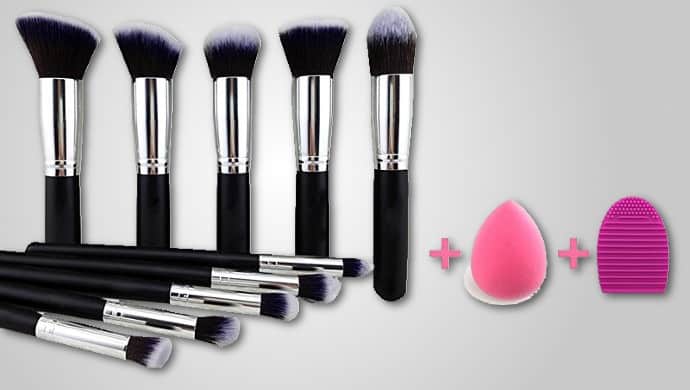
Makeup Sponges and Brushes
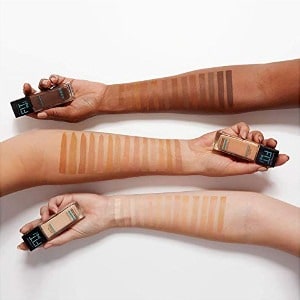
Foundation makeup
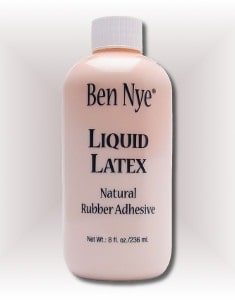
Ben Nye Liquid Latex
Ben Nye Stage Blood
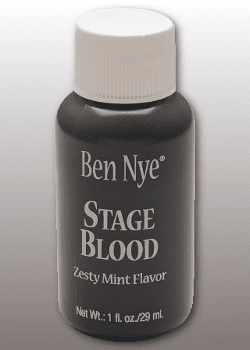
- Ben Nye Stage Blood
- Used exclusively on “Alien Resurrection”
- Arterial Coloring
- Medium Viscosity
- Safe to use in and around mouth
Ben Nye Scab Makeup
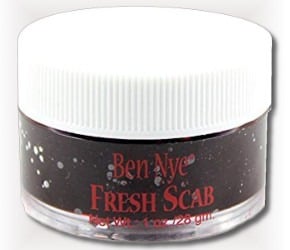
- Blood clotting effects
- Maintains jelly-like consistency
- Brown tint for dried blood look
- Corn-syrup based
- Peppermint flavor
- Safe for around the mouth
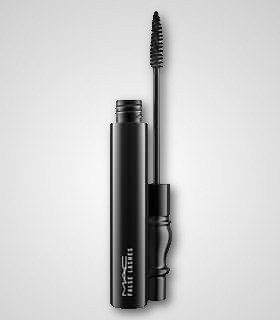
MAC Liquidlast Liner
Injury Makeup Stack
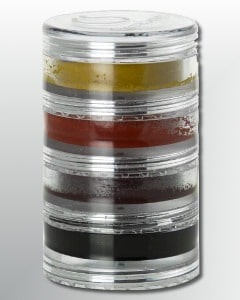
- Vibrant colours
- Yellow for swelling
- Red & Purple for bruises
- Black for abrasions & cracks
- Professional quality
Mehron Clown White Makeup

Setting powder

- Ultrafine setting powder
- 1 oz shaker container
- Neutral/translucent
- Ideal on colored grease/cream makeup
- Clump-free
- Anti-perspirant
- Made in USA since 1927
Zombie Eyes

9 step guide to create zombie wounds
- To begin creating your zombie scars, apply a base coat of liquid latex around the area where you intend to be wounded; such as along your forearm or down the side of your jaw line. To do so, use your makeup sponge to apply an even layer of liquid latex over this area. After leaving to dry for 10-15 minutes, apply one or two more layers over this area to create a solid base for your wound.
- Once you have created this base you should form some latex strips with which to begin building your wound. You can do so by taking a small amount of liquid latex, mixing it with a sheet of toilet paper, and rolling into a strip. If you make multiple latex strips and lay them out on a sheet of foil before you begin then you can take your time to craft your wound without having to stop to make more strips!
- Once you have created a sufficient amount of latex strips you can begin to apply them over your base coated area to form the basic shape of your wound. As you place each latex strip onto your face, arm or wounded area make sure that you use a sponge to apply more liquid latex over these strips as you do so in order to ensure that each strip stays in place. After you have applied all of your latex strips, you should coat them in more liquid latex and leave to dry for 10-15 minutes.
- After these strips have dried in place you can begin to mould them. By pulling them apart gently you will add an overall ‘rotting effect’ to your zombie wound. Once you are happy with how your wound looks, you should add another layer of latex strips, coat them in more liquid latex, and leave to dry for 10-15 minutes before moulding.
- You should keep repeating this layering, drying and moulding process until you have created a deep zombie wound in the style of your liking. Although this process requires patience, after several layers you will be able to boast a deep zombie wound with an authentic peeling, rotting look!
- Now that you have created your zombie wound you can begin to blend it with your deathly pale complexion. As mentioned in our “DIY Zombie Makeup” blog, you should cover any areas of skin that will be exposed underneath your zombie outfit in light coloured foundation, pale non-shiny face powder or white face paint. You should use this same foundation/powder/face paint to blend your zombie wound. Using a makeup sponge, dab your preferred foundation/ powder/ face paint across the entire wound so that it blends into your skin. You should also dab a darker coloured foundation along the creases of your latex strips and emphasise these edges by shading them in with some black eyeliner in order to add depth to your zombie wound and to facilitate a gouged, bruised look.
- Once you are happy with how your foundation looks you can begin to add the most important aspect of any zombie wound; blood! Using your stage blood and a makeup sponge, generously apply stage blood into the centre of your zombie wound. If you add a layer of stage blood, allow it to dry slightly and then dab over it with more blood and a makeup sponge then you will be able to create a multi-textured, coagulated look.
- Once you have finished generously applying your stage blood you can perfect your zombie wound by shading in any outstanding areas with a makeup brush and some matte black, red and purple eye shadows or similarly coloured face paints. After all; with zombie wounds, the gorier the better!
- Now that your zombie wound is completed all that is left to do is add some more stage blood around the affected area. For instance; if your wound sits along your jaw line then why not have some blood dripping down your neck? Or if the wound has been inflicted to your forearm then you could even apply some fake blood dripping down towards your wrists? The choice is yours!
So why not have a go at creating your very own zombie wound today? All of the supplies listed in this guide are available at our one-stop zombie shop whereupon you can view all manner of living undead memorabilia. What’s more, due to the fact that we at Zombie Pit love all things zombiefied, we have also compiled some of the best zombie wound tutorial videos currently available on the world wide living undead web. By using our zombie makeup tips alongside the advice of these expert YouTubers, you can skilfully design and develop your unique style of zombie wounds with which to suitably terrify all your friends and family!
Zombie Neck Wound Video Tutorial
This is a great tutorial for learning how to apply a realistic zombie neck wound. With a little practice, you could create this amazing look which is sure to bring maximum shock and admiration wherever you wander this Halloween.
Zombie Arm Wound Video Tutorial
You can quickly learn how to create a truly vivid looking zombie arm wound with this beautifully presented tutorial. Quickly learn how to create the appearance of torn skin and exposed flesh for a shocking look that will be the envy of all the other zombies.
With a few simple tools and a little practice, you can elevate any simple zombie costume to a walking/living/undead zombie that will get you noticed. For a finishing touch, zombie contact lenses are great for creating that vacant, zombie stare that will make your costume truly convincing. Check out our whole range of suggested Halloween Makeup for more ideas. We are adding items all the time.
For an easy to follow step by step guide on how to create a stunning zombie look, visit our easy zombie makeup tutorial. Our Halloween Makeup section contains a whole range of makeup ideas to help you complete your ensemble, whatever gruesome garb you have selected this Halloween.
If you need some inspiration on completing your zombie look, check out our Halloween Costume Section for some great ideas.